Share
Pin
Tweet
Send
Share
Send
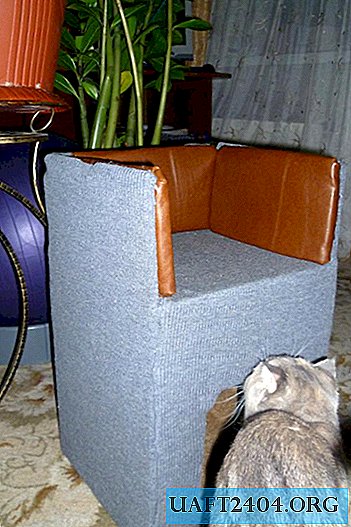
In pet stores, the choice of any "bells and whistles" for pets is, of course, wide. But the purchase of a finished house is not always affordable, and it is not known whether your pet will like the purchase. You can try to build a house on your own, from what you find at home. It will turn out cheaper, and he will have a smell at home, home.
So, we carry out an audit of materials in personal pantries, select what can be useful to us, and buy all the missing.
I found a suitable multicooker box, the remains of foam rubber, an old sisal bag and pieces of fabric: gray knitwear and red faux leather.


Of the tools we need: a knife (can be clerical), a glue gun (it does not smell), a stapler and scissors.
First, draw with a pencil and cut out the entrance to the house with a knife. For example, like this.

My cat loves natural materials, and I decided to glue the box walls from the inside with burlap using a glue gun. I washed and dried the bag, of course, and then cut it into pieces of the right size. Do not forget to cut the inlet in the burlap.


We build the ceiling from the box lid, attaching it to the walls with a glue gun on all sides around the perimeter.
The "bedroom" is almost ready, and on top of the three remaining elements of the box you can now make the second floor. We’ll arrange a bed for our cat here. For greater strength, we bend the sticking cardboard boxes in half, fastening them with a stapler and glue. Then we form the walls, gluing three bent cardboard boxes together. The frame of the house is ready, you can start decorating.


By the size of the walls of the resulting frame, we cut out the strips of knitwear, taking into account allowances on all sides of about 1-1.5 cm, and we fit the walls of the house outside with them, gluing the fabric gradually, along the way with the glue gun. We bend the upper allowances onto the inner part of the walls of the future couch. Do not forget about the inlet! We cut it out with an allowance of 2 cm and glue the edges on the inside of the "bedroom".


We make three pillows from foam rubber and artificial leather, it will be a soft sheathing of the walls of our stove bench. We cut out rectangles from artificial leather in proportion to pieces of foam rubber, leaving allowances of 3-4 cm.

We lay the pieces of foam on the wrong side of the leather rectangles, bend the allowances. We cut off all excess in the corners and carefully wrap each corner. We sew the folds obtained in the corners of the pillows with a needle, sew the allowances for foam. Pillows are ready.

We glue the resulting three pillows on the walls of the second floor, squeezing them well.

It remains to put a soft litter inside the house and on the stove bench, decorating it according to your taste and cat's preferences. Housewarming!

Share
Pin
Tweet
Send
Share
Send

