Share
Pin
Tweet
Send
Share
Send
1. Take 30 square sheets of paper.
![](http://img.uaft2404.org/img/sdela-2019/kusudama-malenkaya-cherepaha.jpg)
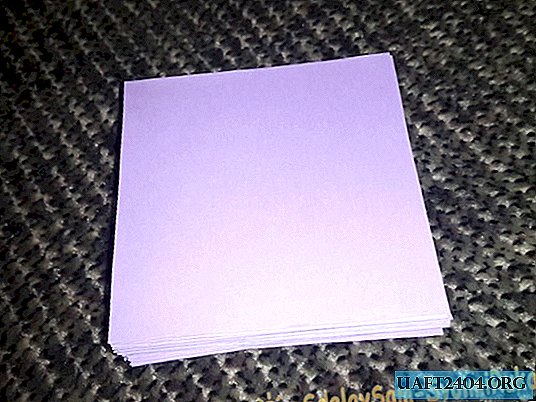
Colors can be anything, Kusudama looks good in any performance.
2. Select one sheet. Bend it in half and straighten.
![](http://img.uaft2404.org/img/sdela-2019/kusudama-malenkaya-cherepaha-2.jpg)
![](http://img.uaft2404.org/img/sdela-2019/kusudama-malenkaya-cherepaha-3.jpg)
3. Fold along the lines marked in Figure 3. Blue is mountains, red is valleys.
![](http://img.uaft2404.org/img/sdela-2019/kusudama-malenkaya-cherepaha-4.jpg)
4. Fold the valley along the red line.
![](http://img.uaft2404.org/img/sdela-2019/kusudama-malenkaya-cherepaha-5.jpg)
5. Move the triangle (it is necessary to turn the selected fold from the valley into a mountain) in the other direction.
![](http://img.uaft2404.org/img/sdela-2019/kusudama-malenkaya-cherepaha-6.jpg)
6. Fold from step 4 on the opposite side of the module.
![](http://img.uaft2404.org/img/sdela-2019/kusudama-malenkaya-cherepaha-7.jpg)
7. Fold down the valley.
![](http://img.uaft2404.org/img/sdela-2019/kusudama-malenkaya-cherepaha-8.jpg)
8. Turn 90 degrees.
![](http://img.uaft2404.org/img/sdela-2019/kusudama-malenkaya-cherepaha-9.jpg)
9. Fold the mountain in a blue line.
![](http://img.uaft2404.org/img/sdela-2019/kusudama-malenkaya-cherepaha-10.jpg)
10. Fold the valley in half. Repeat at the back.
![](http://img.uaft2404.org/img/sdela-2019/kusudama-malenkaya-cherepaha-11.jpg)
11. Fold the valley along the red line, repeat from the opposite side at the back.
![](http://img.uaft2404.org/img/sdela-2019/kusudama-malenkaya-cherepaha-12.jpg)
12. Make folds from step 12 above the other two ends of the module, but, unlike the previous step, bend them back.
![](http://img.uaft2404.org/img/sdela-2019/kusudama-malenkaya-cherepaha-13.jpg)
13. Expand the center fold, but not completely.
![](http://img.uaft2404.org/img/sdela-2019/kusudama-malenkaya-cherepaha-14.jpg)
14. The module is ready. Add another 29.
![](http://img.uaft2404.org/img/sdela-2019/kusudama-malenkaya-cherepaha-15.jpg)
15. Two connected modules. The end of one enters the other.
![](http://img.uaft2404.org/img/sdela-2019/kusudama-malenkaya-cherepaha-16.jpg)
16. Three connected modules.
![](http://img.uaft2404.org/img/sdela-2019/kusudama-malenkaya-cherepaha-17.jpg)
17. Five modules.
![](http://img.uaft2404.org/img/sdela-2019/kusudama-malenkaya-cherepaha-18.jpg)
18. Ten modules.
![](http://img.uaft2404.org/img/sdela-2019/kusudama-malenkaya-cherepaha-19.jpg)
19. Continue to assemble the kusudama.
![](http://img.uaft2404.org/img/sdela-2019/kusudama-malenkaya-cherepaha-20.jpg)
20. The closer you are to the end of the assembly, the more carefully your actions should be.
![](http://img.uaft2404.org/img/sdela-2019/kusudama-malenkaya-cherepaha-21.jpg)
21. The last module.
![](http://img.uaft2404.org/img/sdela-2019/kusudama-malenkaya-cherepaha-22.jpg)
22. Kusudama is ready.
![](http://img.uaft2404.org/img/sdela-2019/kusudama-malenkaya-cherepaha-23.jpg)
If you wish, you can rebuild the kusudama by first turning each module in the other direction. Then the kusudama will look more abstract, as in the picture.
![](http://img.uaft2404.org/img/sdela-2019/kusudama-malenkaya-cherepaha-24.jpg)
Share
Pin
Tweet
Send
Share
Send